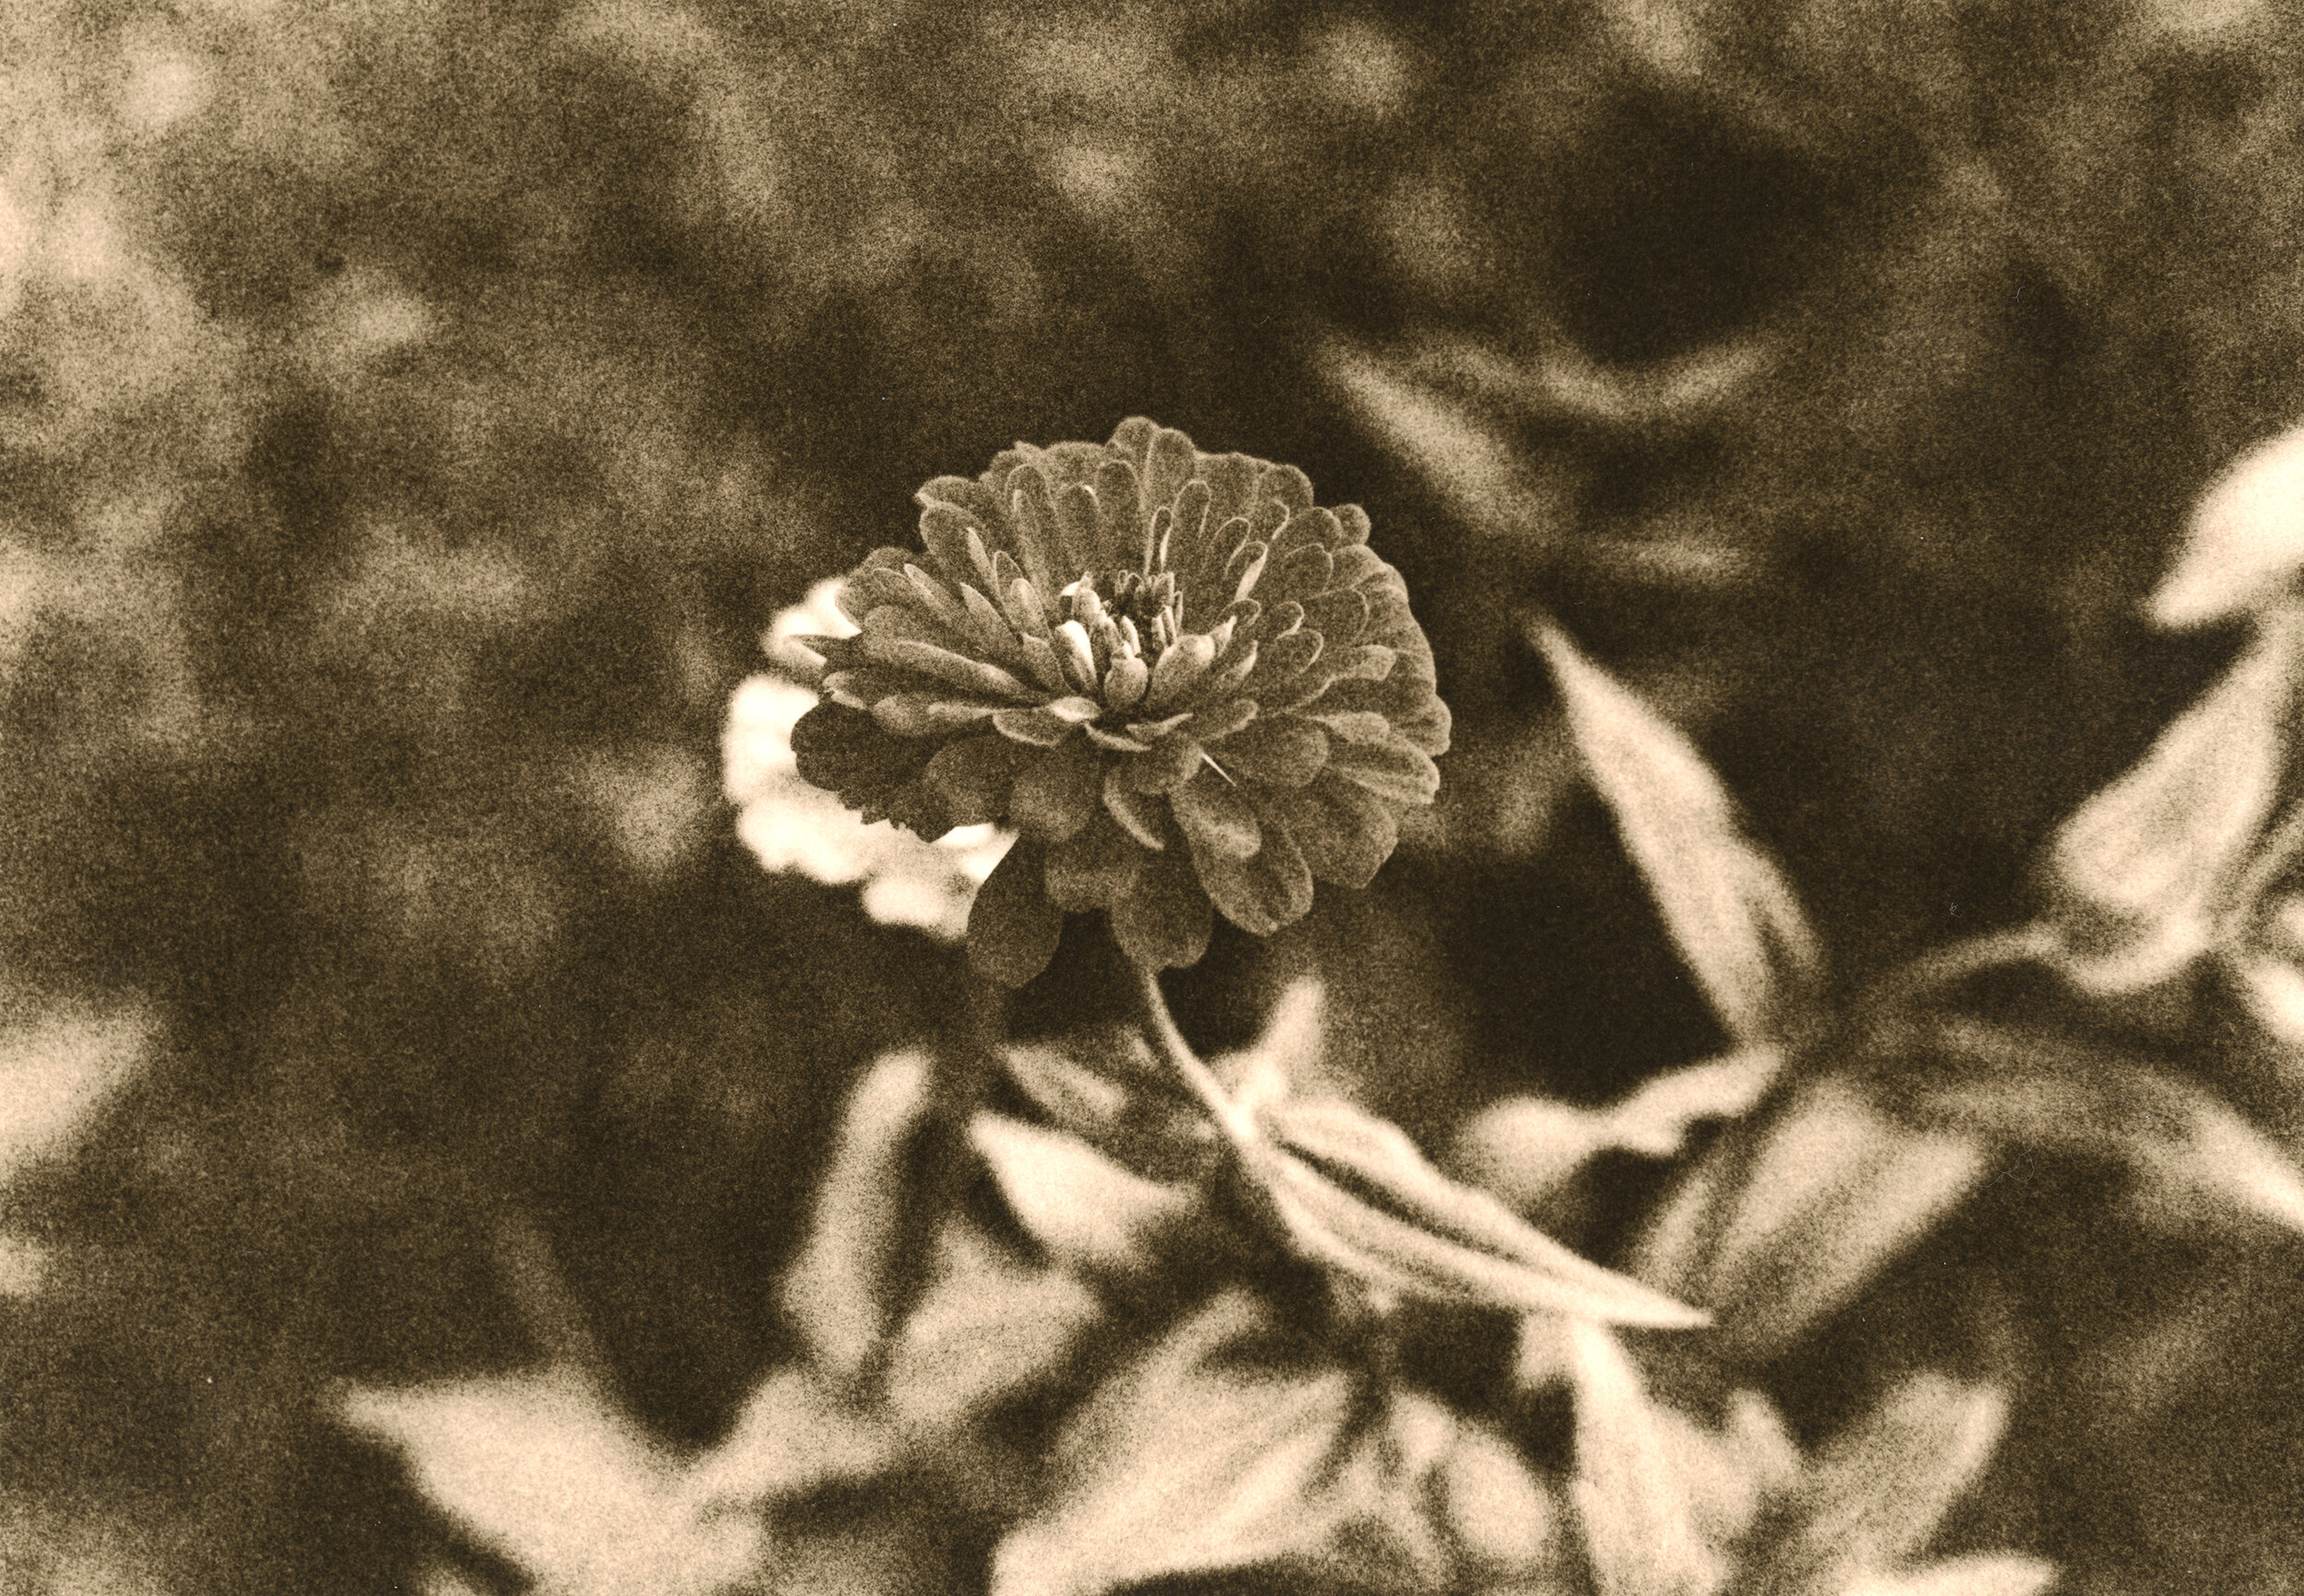
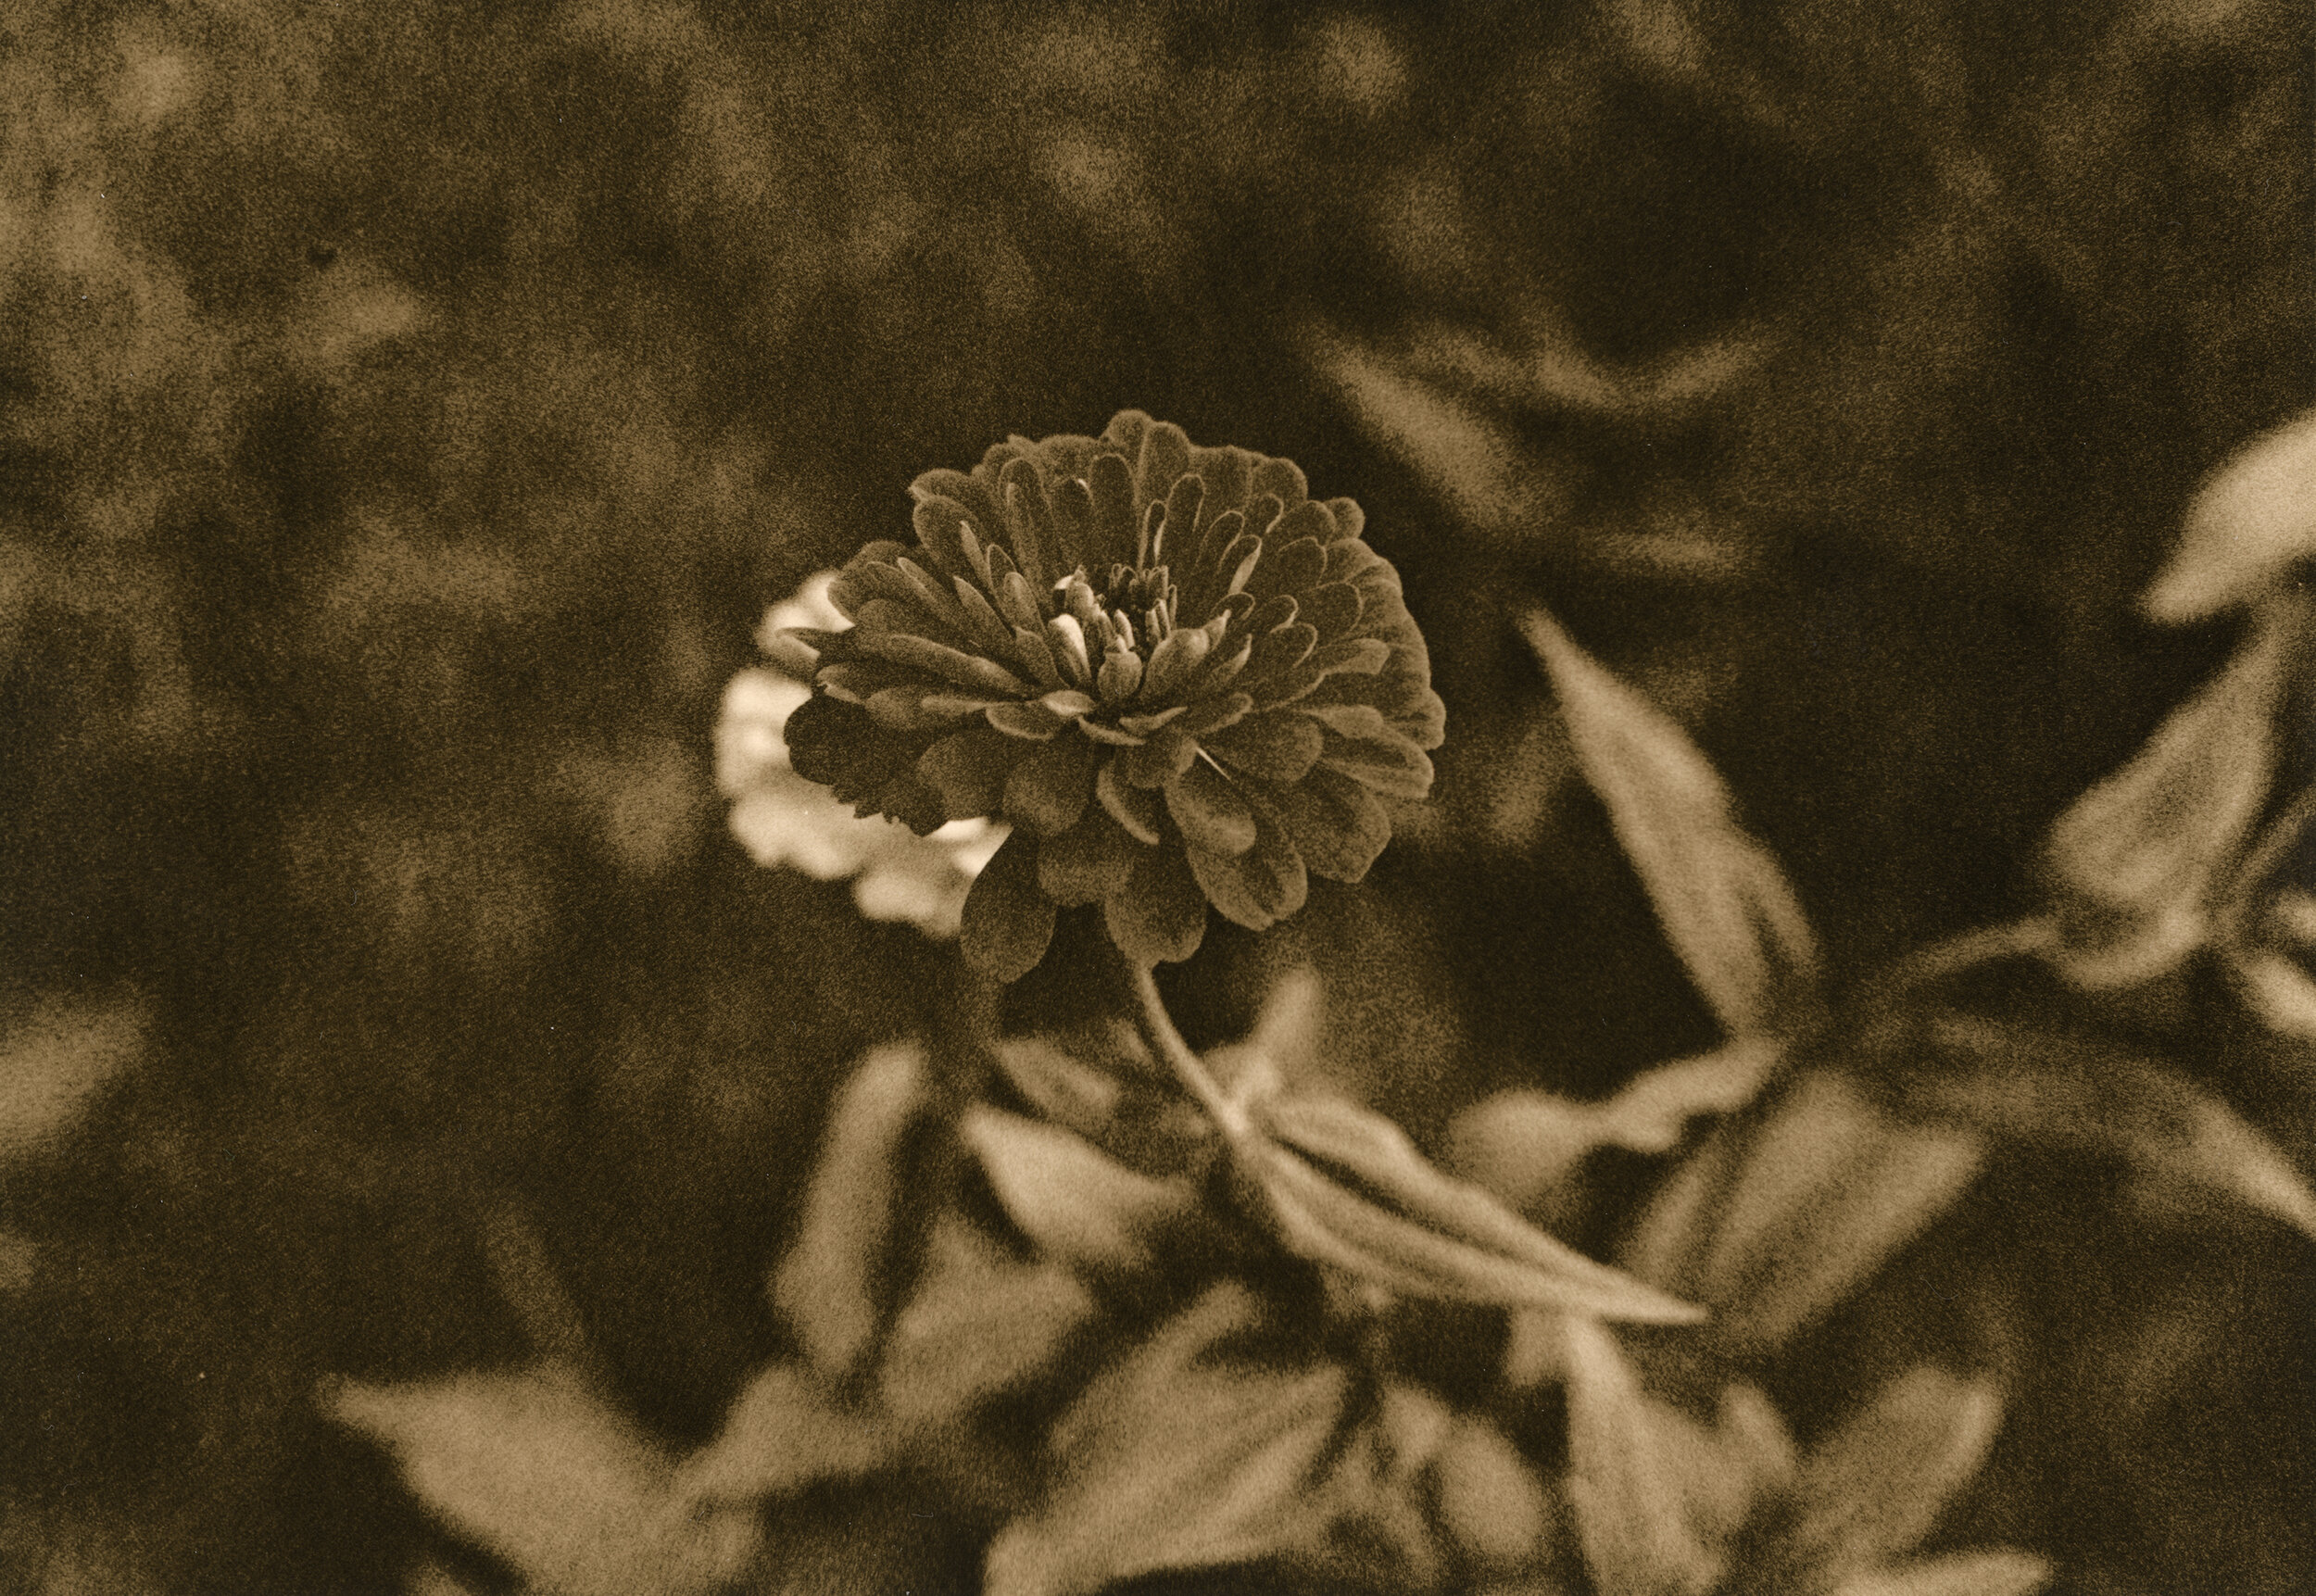
ModernLithC3 is a new in-progress lith printing developer formulation for fast results. This post also includes an update about a complete breakthrough in ModernLith formulation, specifically using the over the counter drug “Miralax” as an easily available and cheap source of polyethylene glycol (PEG) 3350. The addition of PEG allows for unmatched highlight contrast control compared to previous ModernLith formulas. The full prototype formula is included, though it is more dangerous to mix than I’d prefer right now. It develops papers very quickly, but many papers do not respond well at this point. Includes scans and descriptions of the many papers tested.
Read MoreTwo EXG3 Film Developer Prototypes
Here I write a status update with prototype developer results in making EXG3, an ascorbic acid+glycin film developer designed for expanded range and higher contrast.
Read MoreHammering EasyLith until it works with modern RC papers
So I’m sure everyone following this place has had that thought. “But earlz, I want to do lith printing on modern RC papers and NOT acquire a huge stockpile of chemicals like you”. Well, some simple tests with EasyLith seems to say that this is definitely possible. The key lies in just getting one extra chemical along with the EasyLith developer kit, some simple sodium hydroxide, or lye.
Read MoreModernLithC1 Progress
Hi everyone. I’ve delayed any real timeline I had for shipping ModernLithC1 kits due to the coronavirus… However, due to this I’ve been doing a lot more testing. I was initially planning to keep the formula a secret but as I do more and more testing, “proprietary” additions can produce good results but compromise in various ways. The formula I continue to get great results with on almost all papers is basically just the original ModernLith formula with very minor adjustments, specifically more carbonate and a tiny bit more sulfite and bromide. The formulation thus far is a 3 part A+B+C kit. The specific names are Developer, Activator, and Stabilizer, respectively. This seems to allow for the most control and the most flexibility with different dilutions. I also had a lith printing survey and got a good number of data points. I’ll eventually write a full blog of the results, but the basic summary is the following:
Fiber based papers are much more desired for lith printing than RC papers, even when modern RC papers could be easily used for ideal results. I believe this is due to the archivability and uniqueness of FB prints compared to RC. Specifically, many people think that RC paper feels too similar to inkjet prints, and “plasticy”. FB papers also allow for some unique textures not available for RC papers. The pain and process required for FB processing seems to be of fairly small concern.
Quite a number of people want to mix the formula from scratch, around 40% surprisingly. Despite how much I enjoy it, I believe many people want a basic set of stock solutions that can produce reliable results. This also has driven me to publish the final ModernLith C1 formula.
Most people don’t care about my other potential products. The only one with any interest in “EXK” an attempt at a neutral tone print developer that is long lived and environmentally friendly (ascorbic acid based).
Most people use a heated setup, ~70%, and of those, most use a “setup” of simply starting with hot water. I tend to do this myself so that the first couple of prints are significantly faster without needing to drag out my sous vide setup (which can also only handle 8x10 trays really)
The biggest concern people have in lith printing is being limited to very few modern “lithable” papers and formaldehyde being harmful to handle.
So, the progress on ModernLithC1 has been dedicated primarily to trying to fix a few issues:
Eliminate fog that develops when using hot developer on Ilford papers
Eliminate snowballing that happens when using cold developer on many FB papers
Keep an interesting spectrum of colors in the final result
Various restrainers were tried for reducing the tendency of fogging in hot developer. Both potassium iodide and sodium chloride. Although iodide works well, it requires a rather huge amount to completely prevent and has a lot of undesirable effects. Some papers really exhibit some weird problems such as mottling and uneven development with very much iodide. This amount of iodide being present also affects the fixer. Specifically, it requires at least double the amount of fixing time and exhausts the fixer significantly faster. It is still something worthwhile to play with as it can produce some interesting tonality and color, but should only be used in tiny amounts and not as a complete fog prevention solution.
Chloride was something I really tried out not with the intention of fixing anything, but rather with the goal of producing deep red tones like is possible on the famous Polywarmtone paper. It didn’t produce that, but was interesting regardless. The primary advantage of chloride is that it seems to very weakly affect most RC papers and maybe even accelerates development on RC papers, but also acts to significantly decrease the amount of snowballing on FB papers, making them reasonable to use with room temperature developer. I believe the chloride stands in as a 90% neutral salt that just helps the developer to penetrate more evenly into the FB emulsions, and maybe to penetrate more quickly into RC emulsions. I believe this is why I had fewer problems when I was using massive (and expensive) quantities of oxalate. The actual effects on tonality with chloride are fairly minor, tending to produce more golden and yellow tones rather than peach and making the famously neutral tone Foma emulsions pick up a hint of warmth in the highlights. Chloride wouldn’t be included with any ModernLithC1 kit, as it’s so easy to find locally (literally just kosher salt etc) and the absolutely massive amounts required. For instance, in most tests I start with ~80g per liter of developer. The exact amount is far from critical for chloride due to it’s very weak restraining effect in this type of developer.
ModernLithC1 v10 prototype formulation
Part A, developer:
Add 100g of hydroquinone to 800ml of heated propylene glycol. Temperature needed is ~140F. Do not boil the glycol and be careful of flammable vapors!
Top to 1L with glycol
Part B, activator:
Start with 800ml of room temperature (not hot) water
Add 350g of anhydrous potassium carbonate. Solution will heat up significantly
Add 10g of potassium bromide
Add 25g of potassium oxalate (determined to be optional, but may increase tray life slightly)
Add 25g of sodium sulfite (use 30g for longer tray life when using old brown)
Top to 1L with water
Part C, stabilizer:
Add 40g of ascorbic acid to 400ml of heated propylene glycol. Temperature needed is ~160F and significant stirring is needed. Do not boil the glycol and be careful of flammable vapors!
Before all the powder is dissolved completely, top to 500ml with heated glycol (solution is very close to solubility limit so the extra glycol makes things go faster)
Part D, bonus:
Start with 800ml of hot water
Add 200g of sodium chloride (anything non-iodized such as kosher salt or pickling salt)
Top to 1L with water
Part C can be substituted with simply adding some ascorbic acid to water to make a % solution. However, the solution will not be stable and will decay within a matter of hours, so only a small amount should be made at a time.
Usage: Start with a dilution of 10ml + 40ml + 10ml per liter for RC papers and 10ml + 40ml + 5ml per liter for FB papers. Stabilizer is optional, but excluding it will cause shorter tray life and poor reactions in some papers. Additional stabilizer tends to slow down infectious development and in some papers trend toward colder brown tones of lower overall contrast. For FB papers especially, add 200ml of part D per liter of developer. This will prevent snowballing and may increase overall development speed. It will also cause some cold and neutral tone papers to give peach highlights and some peachy warmtone papers to give yellow and golden highlights.
Usage of old brown can give nice results, but for consistent results the old brown should be “tracked” and not allowed to “condense” too much. I recommend keeping a “round 1” and “round 2” bottle of old brown. When fresh developer that had no old brown expires, put it into round 1. When the developer expires that used the round 1 old brown expires, put it into the round 2 bottle. When the developer used from round 2 old brown expires, don’t keep it for old brown purposes. Bromide especially will accumulate in old brown as it is condensed more. Because so many modern papers are sensitive to bromide amounts, this can cause poor results where you simply follow “add 200ml of old brown” but end up adding what would be the equivalent of 2L of “uncondensed” old brown worth of bromide. Old brown has a number of effects if used with some caution. The primary components of old brown are additional alkali, additional bromide, and potentially a weak but very stable developing agent called hydroquinone-monosulfonate. In my testing, old brown usage tends to cause more highlight development and thus reducing contrast and to give more colorful highlights in general. Too much old brown can cause the lith “split” to break down, where midtones are too dark but shadows aren’t dark enough. It can also cause blacks to remain fairly brown instead of becoming a properly dark black.
Importantly however for old brown usage, is that it means I can keep ModernLithC1 stock solutions very low bromide, but also not need to provide yet another solution part for the papers that might give better results with additional bromide. So, the ModernLithC1 formula going forward is basically being designed to incorporate old brown into the final working solution.
And now, for a combo of blooper reels and early success in the formulation, and some notes on things learned.
Ascorbic Acid is a lot more soluble in triethanolamine (TEA) than propylene glycol. It also functions as a chelating agent, keeping the ascorbic acid alive longer in tap water containing iron. I was hoping I could use it in the part C so that it can contain more ascorbic acid and it’d increase tray life stability. However, TEA seems to intensify potential staining and fogging. It also causes some papers to develop unevenly, even in extremely small amounts. In previous testing TEA has seemed to interfere with infectious development and this was doubly confirmed in these recent formulation tests with fairly large amounts of TEA. It didn’t exhibit the same effect when using very small amounts.
Benzotriazole is an interesting addition. It is soluble in propylene glycol, unlike other possible restrainers. While a small amount definitely cools the print image, if a lot more is used it can actually give very warm tones, especially toward browns and even reds. On most papers though a large amount massively slows down development, and require significantly more alkali to get proper infectious development. It does however cure the staining issue I see on some papers with heated developer. I don’t really like the effects it tends to give so it won’t go into any official ModernLith formulation, but feel free to make a 0.1% solution and add between 5ml to 100ml. 100ml is where it will start to give warmer tones, while 5-30ml it’ll give colder tones.
I tried using isopropyl alcohol in the formulation just to see if it would prevent snowballing, and it actually made things incredibly very badly worse. It also is very strong smelling in a tray, caused shorter tray life, and is a hard to find commodity these days with the coronavirus and all.
As a conclusion, I still have a small number of notes to directly apply to improve this formula, as well as ideas still to try. It has been more frustrating than I imagined really to get something I’m 100% happy with, especially when going beyond the great Ilford MGV RC. However, progress is being made, and hopefully after this coronavirus stuff dies down, I can look more seriously at something that can be shipped.
Prototype Update #10 (brown warmtone developer, EXI series)
I’ve been taking a break from lith developers due to general frustration, but I haven’t been giving up on other new interesting paper developer formulas. EXI is a series of experiments with the aim of creating a very warmtone developer that works properly with modern papers. Every warmtone developer formula I’ve tried with modern papers either skews to green/olive, or can’t produce convincing blacks.. or in general looks minimally warmer than Liquidol etc. This developer is being formulated primarily with convincing warmtones on the paper I’ve had a ton of trouble with, Ilford Warmtone RC. There are a few ideas being tried. The theory behind a warmtone print is that the grain size of the prints is fairly small. Grain size correlates with color and from smallest to largest goes: yellow -> red -> green -> brown -> purple -> black… of course with some weirdness and exceptions on different emulsion designs.
The break through I found in keeping the color more toward brown, rather than the more typical black/purple/green spectrum is sodium oxalate (though potassium oxalate should work better). I don’t entirely understand how it works, but it seems to function as a unique restrainer and potential silver solvent. It helps to intensify blacks in some ways and in other ways makes shadows skip from olive green to sepia and brown colors. It seems to have minimal effect on highlight tonation.
The following is “EXI4”. Note that this is definitely a prototype developer that I’m still optimizing and eventually plan to make a stock solution version so that I don’t go insane
Part A:
10ml of Glycin-TEA 10% (can be substituted with 1g of glycin, and 10ml of triethanolamine, added last)
1ml of Phenidone-glycol 1% (can be substituted with 0.01g phenidone)
30ml of triethanolamine (clear 99% grade)
3.1g sodium oxalate (can be mixed into a % water solution, potassium oxalate should also work better as a substitute)
8g sodium sulfite
0.6g potassium bromide
to 500ml water
Part B:
hydroquinone-glycol or TEA 10% can be used (in the future an HQ metabisulfite solution can probably be formulated like Adam’s variant of Ansco 130)
Add up to 5ml of part B to the final solution for deeper blacks and more overall contrast. Without any part B blacks will be rather brown.
The solution lasts in a tray at least a few hours, and should have fairly “normal” tray life otherwise. Develop for 3-5 minutes, 4 minutes is typical. Imagine will come up fairly linearly, image should appear pretty much “done” at 2 minutes under safelight, but blacks will continue to intensify and pulling early can result in some streaking in blacks. Over expose print by 1-2 stops compared to most other developers.
Results are overall brownish warmtone, especially in the shadows. Works best with warmtone papers, but will also give subtle warm brown tones to some neutral papers.
Magic Lith Prototype Update #9 -- EXH Failure
In testing an idea with EXF where I combined ferrous sulfate, hydroquinone, triethanolamine, and carbonate I observed that the developer continued to work for a good amount of time in a beaker, several hours. I wanted to do a control test to see what ferrous sulfate was contributing to the process though. I made the same solution, but with no ferrous sulfate, and ensured that the pH of both solutions was the same. The results were incredibly surprising. The “control” without ferrous sulfate stayed alive for a very long time. Still producing images after 8 hours, though at around 300% slower speed. This seemed promising though, since there in theory was only hydroquinone acting as a developing agent and even if a lot of the hydroquinone oxidized, as long as some was alive infectious development should be possible…
But once again I’m smacked with abrupt failure when trying a similar concoction, EXH1, in a tray with actual paper tests. The developer works for a long time, can develop good blacks, and develops fairly quick at room temperature, but does not exhibit any infectious development. It also requires a lot of bromide to reduce fogging levels. The exact formula is as so:
2L water
Triethanolamine (TEA) 100ml
Potassium carbonate 12g (6g of 20%)
Hydroquinone 1g (in propelyne glycol 10%, 10ml)
2g of bromide (20ml of 10%)
The very high amount of TEA seems to preserve the hydroquinone quite well though the solution does quickly discolor.. However, a big give away is that there is very little red film present on the developer after a few minutes. It also does not give any infectious development, nor other hallmarks of lith printing like colorful highlights. In this the induction period seems to blur into shadow and black development, meaning that with more development the entire image gets darker and more highlights become present. I tested this on many papers, including Kodabrome which is a very good lith paper in traditional formulas. My hypothesis for the reason behind this failure is that TEA reacts, not with hydroquinone nor benzoquinone, but rather reacts with the radical semiquinone to produce some kind of complex which either is a weak developing agent or is not active. In this respect, a large surplus of TEA reacts in the same way as a surplus of sulfite would, it scavenges oxygen and preserves the hydroquinone, but also scavenges the semiquinone and prevents infectious development. With this in mind, HQ mixed into propelyne glycol would be a better “part A” than HQ mixed into TEA. With a lot of research, I’ve found this is a big subject area with very little or no previous research written about it.. However, TEA with other quinone compounds is known to form complexes with semiquinones and is also an electron donor, meaning it can potentially convert semiquinone back to hydroquinone. It appears to be an imperfect preservative compared to sulfite, since the solution will quickly discolor to brown, but either way the end result is that this is a major dead end into a fair number of ideas I had about this. I’m not really sure what else can be done at this point.
Magic Lith Prototype Update #8 -- EXF4 "Pharoh Lith"
Decided to do more testing with the EXF “Pharoh Lith” series. I found my way into a very interesting developer, though not ideal for all lith printing subjects. It definitely uses hydroquinone as the primary developer, and the blacks get nice and deep while highlights stay fairly gentle. However, midtones still develop relatively fast compared to black development. The end result is that this developer works great when you want to make a higher contrast print (say grade 4) with enhanced highlights, but it gives poor results when trying to make it lower contrast with more exposure, because everything becomes midtones that develop quite fast and it’ll be hard to get a good black level without all the midtones being fairly dark.
The formula I used:
2g of hydroquinone in propelyne glycol (20ml of 10%)
4g of ferrous sulfate heptahydrate
60ml of triethanolamine (TEA)
0.6g of bromide
0.5g sodium hydroxide
12g potassium carbonate
Final pH ~11
2L of developer topped with water
The ideal order of mixing these components isn’t determined yet. The ferrous sulfate, hydroquinone, and TEA all react with each other and their environment in different ways. The exact order I mixed was ferrous sulfate, TEA, and carbonate in 2L. Then pour in the hydroquinone, then add the hydroxide and bromide. I’m fairly certain this is not the ideal method of mixing to avoid iron sludging that’ll stain prints though. The carbonate and hydroxide each do different things and I’m fairly certain that the ratios of them need optimizing.
This developer is a departure from EXF1, as it does not appear to give an iron image and will instead give fairly warm olive tones and colder shadows on warmtone paper. Fairly typical of a lith developer. Unlike a typical lith developer though, this will show consistent activity levels for at least 2 hours or 16 8x10 prints, and features a fairly fast development time at room temp. It is optimized for non-lithable Ilford RC papers right now. I tried some lithable paper and it developed too quickly and with no tonal separation. I believe the surplus of HQ is to blame there.
The exact chemistry of this developer is complex and probably beyond my capability of understanding, much less explaining, but I’ll try anyway. So, there is 4 different interactions in this developer. The end result is that the HQ is kept alive at a constant level for a relatively long time.
HQ: Oxidizes from exposure to oxygen in an alkaline environment to Q (benzoquinone). Also can oxidize to a semiquinone when developing (semiquinone is the key ingredient of infectious development). HQ will also oxidize Fe or Fe3 and convert to Q, while the semiquinone will oxidize Fe and Fe3 and convert to Q. The semiquinone will oxidize (I think) with oxygen to form either benzoquinone, or a degraded polymer quinone which can’t be reversed.
Ferrous (Fe2) Sulfate: Is photographically active in an acidic environment but seemed to have very little developing effect when at pH 11. Will reduce Q to HQ and convert to Fe3 ferric ions/sulfate (?). Also easily oxidized by oxygen in an alkaline solution to convert to Fe3. Can also combine with carbonate or hydroxide to form Ferrous Carbonate/Hydroxide. Ferrous carbonate seems to not be capable or extremely weakly capable of developing silver, but hydroxide appears to be capable and is why EXF1 has an iron image. Both compounds are only barely soluble and will mostly precipitate from solution.
TEA: Is a known silver solvent at the concentration being used but also functions as a chelating agent, capturing stray Fe2 and Fe3 ions. Seems to be inactive to HQ, but interacts with all iron atoms. It will reduce Fe3 to Fe2, and then Fe2 to Fe in an alkaline (>9 pH) solution. The exact reaction speed and conversion rates between each form of Fe varies depending on alkali used, even if kept at the same pH. Probably due to reaction differences with carbonate vs hydroxide forms of iron.
As you can see, definitely a lot going on, and why balancing this developer for ideal results will be more analytical than most things I do. Too much TEA and you end up with metallic iron that’ll oxidize the hydroquinone. Too little and the Fe2 won’t be stable. I believe the lack of midtone separation here is due to these ratios being unbalanced. In the middle there was some iron specks, but near the end there was absolutely no metallic iron I could see in the developer. In the middle the solution was more orange rust colored and clearly colored but transparent for the first hour (ie, I could see the print fairly well). As more printing and time passed it grew darker in color and with a more reddish hue, typical of oxidized hydroquinone developers. Throughout all development it had some very fine powder present which didn’t immediately sink to the bottom (ie, probably not metallic iron).
So, given the progress and end result, here is my hypothesis for how it is unbalanced.
Too much hydroquinone being kept alive, hence the overeager midtones. With less I believe that infectious development would be more of a source of development rather than hydroquinone itself. In a previous test with half the HQ, development speed was significantly reduced though
Unknown for sulfate? The solution should’ve stayed at least semi green for a while longer than it did. TEA is documented to preferentially reduce Fe3 to Fe2 before Fe2 to Fe. In theory with proper balancing, there should never be any Fe in solution. If I add less then in theory there is less Fe2 to be reduced to Fe. The Fe2 amount should be enough to keep the HQ alive and nothing more.
Unknown for TEA? I can’t tell if I should add more or less. With less there wouldn’t be any reduction of Fe2 to Fe, but also I believe overall tray life is definitely dependent on TEA amount, with the sulfate being more of a balancing agent that determines the rate of HQ decay. With more however there would probably be more reduction of Fe2 to Fe. Making sense of the cycle of interactions and metastability makes my head hurt.
I think for now I’m going to keep things simple with changes and try reducing hydroquinone and sulfate by half or even to a quarter, and keeping everything else the same aside from needed pH adjustments. In theory with less sulfate it would always just be kept alive by the TEA and more slowly restoring the HQ, giving more time for infectious development to occur from semiquinone activity. If there is any excess then it simply decreases HQ in solution and increases iron sludging problems. My hope is that TEA in such a balance doesn’t do much other than act as a weak silver solvent (ie, reducing grain) and otherwise sacrifices itself to keep both sulfate and HQ alive until eventually it’s completely oxidized and the developer is completely dead.
Magic Lith Prototype Update #7 -- EXF / "Pharoh Lith"
Thanks to weird ideas and interesting non-photography chemistry papers, I’ve stumbled onto an extraordinary method of lith printing. I call it “Pharoh Lith” as a pun on ferro as in iron in a less common oxidation state. Pharoh Lith is a developer that basically breaks every rule in the book for a developer in order to exploit some exotic chemistry. The formula for EXF1 is as so:
2L of water
Some shreds of steel wool (amount is not important)
3g of hydroquinone (can be in propelyne glycol or TEA. Either work just as well, but TEA may require pH adjustments)
0.8g potassium bromide (8ml of 10%)
1.5g of sodium hydroxide (30ml of 5%) (target pH is between 11.5 and 13)
Preferably waiting 20-30 minutes before using this developer to allow the chemistry magic to happen (otherwise, first 2 or 3 prints will develop too fast and not exhibit good contrast)
Process (recommended)
Rinse print before development (removes incorporated developers and ensures more even development)
Develop. Typically takes 5-15 minutes depending on developer temperature, bromide content, and paper choice. Lithable papers will develop quite quickly
Put into proper acidic stop bath, citric acid or regular indicator stop should be safe for this. Water bath can also be used but must be changed often. If the stop bath becomes alkaline it can cause iron fibers to seem to appear on the print and cause staining
Rinse well under running hot water, at least 30s, to remove any stray fibers etc
Fix in acidic (ie, not TF-4) fixer
Rinse well
Dip into acidic solution “to taste”. Strong solutions of oxalic acid will remove the superimposed iron image and decrease overall density on certain papers, but a short and dilute dip will help clear highlights without affecting other tones. A stronger >1% Citric acid should in theory remove any sludging from highlights with no tonal changes at all, though may be less efficient at clearing sludging and thus also affect archivability. More testing required. This acid dip can be skipped, but permanence will be especially unknown if not fully toned afterwards.
Standard archival rinsing
Tone image in an archival toner (gold or selenium)
When this is mixed the developer will quickly turn “dead developer brown”. This is exactly what you want. Basically the way this developer works is that the HQ quickly dies (forms photo-inactive benzoquinone) both from the iron in solution, and generally fast oxidation in such an alkali solution with no sulfite. However, if you’re patient and wait for the developer to die pretty much completely, an amazing thing happens. It comes back to life as a fairly stable developer. It’ll still be opaque dark brown so inspecting development progress is annoying, but the developer will work with consistent results over several hours, though it does get slower with more time. If you intend to try this prototype, I recommend buying some cheap pH strips. After the 30 minute warm up period, and occasionally with more prints and time sitting, the pH of the solution will decrease. If the pH drops below 11 you’ll get poor results that also develop incredibly slowly. Anyway, so the results of this are rather incredible AND universal. It works on every modern paper tested so far, though less-hardened papers normally capable of lith will require some chemical adjustments to slow down development (probably more restrainer, maybe less initial HQ).
The overall properties of the prints produced (of course still depending upon paper choice some)
Fairly even development in most cases with proper agitation, even on hardened modern papers
Somewhat warm-brown (depending on bromide content) shadows and extremely warm highlights and midtones, tilting more toward the red and golden colors rather than green.
Some minor overall staining which will give a subtle peachy tone to the paper base. This can be partially removed with farmers reducer, but it is thus far impossible to remove it completely. Highlights will otherwise be extremely sensitive to both ferricyanide bleaching and farmers reducer
Great amounts of contrast control via exposure over highlights and midtones, and a fair amount over lower midtones and shadows. ie, it feels pretty much 90% like lith printing for contrast control. Blacks will come in first, highlights and midtones won’t move after the induction period like in lith printing… but the shadows can tend to darken somewhat fast compared to how quickly blacks completely darken. With previous experiments though, this effect can probably be controlled some with restrainers like iodide and chloride.
A long lasting and consistent developer. I used it for 3 hours tonight and made 7 prints, and other than making pH adjustments and a bit of iron sludging (easily cured with a quick acid dip) the prints looked nearly identical, but with warmer blacks at the end due to bromide added by printing
An iron image superimposed on the silver image in the shadows and especially blacks. This effect is why the image is so warm, and also why the permanence without toning is in question. The iron is most likely simple iron (Fe3) oxide, but if there is any iron hydroxide or other iron salts, then this can oxidize the silver over time. With selenium or gold toning though, the silver would be protected from oxidation. Gold toning is especially nice for this, producing blue highlights and midtones (if you go far enough) and warm brown shadows, if you don’t go for complete toning. If completely toned the entire image will be rather blue with shadows being closer to neutral. Note however, that this iron image can cause differences for bleaching. Typical ferricyanide bleach will not touch the iron image and any uncleanliness will be revealed by small specs of prussian blue. Ferrocyanide bleaching would convert the iron image to prussian blue, allowing you to potentially shift the dramatic warm colors to insanely cold and blue colors after redevelopment of the silver. Note I haven’t tried that at this point, need to order some ferrocyanide first. The iron image will be rather weak and nowhere near black enough to use with complete bleaching and fixing of the silver
Extremely fine grain at lower pH levels (11.5) and increasing grain in the shadows as pH is increased. Development also goes somewhat quicker and contrast is higher with a higher pH level.
Explanation of chemistry:
This is more of a best guess, but this is how I think the chemistry behind this works. According to a paper, the reaction of HQ with metalic Fe goes like so:
Fe is oxidized by HQ, producing Fe2+ and Q (benzoquinone)
Fe2+ ions will reduce Q ions to HQ, ie, it restores the developing ability. Fe2+ ions are converted to Fe3+ in the process
Fe3+ is made insoluble by the alkali solution and converted to Fe3+ oxide and Fe3+ hydroxide. Fe3+ can combine with HQ to once again produce Q.. but it seems like an alkaline solution makes it decompose naturally more quickly than HQ can decompose it.
Basically the iron functions as a “battery” for the HQ. You charge it with HQ in the solution, and it consumes pretty much all of it, then begins to release it but over a much longer time period. The paper referenced claims that HQ will still be in solution over 10 hours later, but at around 1/4 of the level originally put into the solution, and with a great curve when the HQ first begins being produced with it going from about 10% lower than initial amount to 50% lower over 2 hours. The paper only used a pH of 9 however, so using this significantly higher pH and plus introducing silver halides into the mix puts this into mostly uncharted territory. In addition to the Fe2+ regenerating Q into HQ, it also is a reducing agent and I believe will function as a weak developer. With a higher pH however this effect seems to mostly disappear, probably due to Fe2+ being unstable in alkaline solutions. This is why a pH of at least 11.5 is recommended. Below this level you’ll get a more normalized non-lith type of contrast and significantly more staining. The actual staining function of this developer I don’t really understand and can’t find any reference to. There are ancient ferrous based developers which produce a similar effect, but these are typically only ferrous sulfate or ferrous oxalate, and only within an acidic solution. In this process, the Fe2+ has nothing to become a complex/salt with other than the bromide, which I also believe is only possible in acidic solutions.
Magic Lith Prototype Update #6 - EXB frustrations
In trying to “perfect” EXB, I finally started doing proper note taking and making a progression of prints and seeing exactly what ingredient additions on the print has, as well as trying a few different papers. Previously I was taking rough notes and kinda just faffing about to see what my subjective opinion was on each new print. So, I’m going to try doing this post a bit different, with a literal progression of my prints and the modifications made with each one. Each print (excluding cooltone/133) had a print time of 8s, f/8, and target snatch point was when the tower in the background was a bit beyond grey and getting into infectious black. Each scan was adjusted carefully for color accuracy and black depth
The base formula here is EXB7:
2L water
15ml HQ-TEA 20%
2ml Phenidone/Propelyne glycol 0.1%
10ml potassium iodide 10%
50ml sodium sulfite 10%
1ml potassium bromide 10%
20ml benzotriazole 2%
80ml sodium hydroxide 3%
Final pH ~12.5
The first print had significantly too much highlight development and I didn’t keep nor scan it. I added 20ml of benzotriazole and then made this print:
With this it looked decent, but I wanted deeper blacks and more shadow separation. I added 5ml of potassium bromide.
This did seem to help tonal separation some as well as increase black levels (probably due to being capable of keeping the print developing longer), but the changes weren’t too significant, and still wasn’t resembling the poorly documented success I had with EXB4. I decided to add 1ml more phenidone mostly just to see what would happen and if previous experiments were correct.
The results were measurably worse for tonal separation as well as for black depth, probably because it then couldn’t be left in developer as long as previously. Next time I’ll probably opt to start with an even smaller amount of phenidone, like 0.5ml of 0.1% solution. However, since this developer still had plenty of life, I decided to see how it’d treat other papers. I then did Fomatone 133 FB paper (a known “mostly lithable” modern paper) and it produced really nice results. (note exposure and snatch point are different here)
I then tried Adox MC112 FB paper. The results were so bad I didn’t even bother rinsing after fixing. The emulsion had pinholes in it and infectious blacks never came through. Then I decided to try Ilford Cooltone RC. It never went into infectious development so it’s extremely low contrast
Although less complete and granular of a series, I’ll also share a few prints from EXB6 testing
EXB6:
2L water
15ml HQ-TEA 20%
2ml Phenidone 0.1%
20ml potassium iodide 10%
50ml sodium sulfite 10%
1ml potassium bromide 10%
10ml benzotriazole 2%
65ml sodium hydroxide 3%
final pH ~12
With this, things were too eager to go infectious, so I added 10ml of benzotriazole and also 10ml of hydroxide
And then finally for some reason decided to add 0.5ml of phenidone
Then I tried slowing down highlights etc more and get deeper blacks and added 10ml of benzotriazole and added 20ml of hydroxide
Afterwards I tried a number of other modifications, especially with additional iodide and hydroxide and all were failures at getting deeper blacks while slowing down highlights.
Overall, these are the things I think I’ve learned:
Too much iodide eventually will lighten blacks
Magic lith developer formulation seems quite easy if sticking to only a single type of paper.. But the failure here with cooltone RC was especially surprising. Maybe it’s not possible to make an ideal lith developer that works on every paper. You can only make either a mediocre universal developer, or a great specialized developer.
Adox MC112 is the devil
Too much benzotriazole can harm the delicate highlights of lith
Keeping this developer very alkaline definitely makes it fast, but brings with it other problems. Ideal for keeping a differential development rate is somewhere around 12 and definitely less than 13.
Too much phenidone also makes blacks less deep and can cause lower midtones to enter infectious development earlier than desired. Ultimately there is definitely a minimum and maximum range, but ideal range is subjective. I prefer for lower midtones to be untouched until blacks are really deep, but this definitely isn’t a universal “best” thing.
Despite the problems, this is a very stable lith developer. I decided to leave EXB7 alone for a couple hours and when I came back it was a pale brown and seemed to still have enough life for more printing.
Magic Lith Prototype Update #5 -- EXB developer series
So EXA is definitely interesting, and definitely gives lith results on some previously unlithable papers.. However, it has a number of problems that I’m realizing I don’t really want to live with. These problems include:
Must use Glycin. Glycin is only available from one manufacturer, has a terrible shelf-life in powder form, and doesn’t dissolve into TEA particularly well (and doesn’t dissolve at all in most other solvents excluding basic/acidic water where it will quickly oxidize)
EXA still doesn’t produce as deep of blacks on some papers as I’d like and black levels highly depend on sulfite and HQ content. Some of this I’m starting to just chalk up to older Ilford RC emulsions are just crap compared to the deep blacks of MGV, but there is definitely more black capability available when comparing lith prints to normal development.
EXA has really terrible tray life for what I want. It can make 2 prints, at most if deep blacks are desired. It continues to give lithy results with decaying blacks after 2 prints. It’s also extremely sensitive to sulfite and thus it’s a careful balancing act of preserving it while also making sure it continues to work
Highlights and midtones still don’t develop as slowly as I’d like (compared to shadows) in EXA. It’s workable, but it definitely limits the ability to control contrast
So, with this in mind. I’m going a new formulation route, enter the EXB developer series. I stumbled on an expired patent that described a rapid access (ie, fast and high temperature) lith developer containing hydroquinone, phenidone, TEA, substantial antifoggant, and a high amount of sulfite. Some of those are kinda similar to EXA. ie, it contains a secondary developing agent, TEA, and substantial antifoggant. I must’ve read the patent 3 or 4 times by now, but I used the ratios of their formula as a starting point. Of course, their formula won’t just work out of the box. It uses an exotic antifoggant that’s available but discontinued and expensive. It uses a lot of TEA.. like, an expensive amount (~100ml per L of working solution).. And right out of the gate with an adapted and heavily diluted version I made, the amount of phenidone used was unworkably high. I had basically just made a terrible PQ continuous tone developer.
However, here’s my current prototpye formula, EXB4:
15ml HQ-TEA 20%
0.2ml propelyne glycol / phenidone 1% (2ml of 0.1%)
50ml sodium sulfite 10%
4ml potassium bromide 10%
60ml benzotriazole 2%
16ml potassium iodide 10% (!)
2L of water
Adjust to Ph ~12 using sodium hydroxide (probably ~50ml of 3%)
Note! Use fresh fixer and double to triple the normal fixing time. If yellow stains around edges come up while drying, return to fixer.
This formula is great with only minor improvements being figured out at this point, like what results it gives with what papers, if deeper blacks or more tray life is possible, etc. Aside from that though it’s a near ideal developer for many purposes:
Gives incredible difference in development rates between shadows and midtones. After the induction period the highlights and midtones won’t move at all unless you leave it in the developer so long that infectious development gets to it
Quite fast, even at room temp. Induction period is about 2 minutes where the entire print comes up at low contrast, shadows first. For 30s-1m nothing seems to happen, then blacks begin to develop black spots and darken, classic infectious development. Depending on sulfite levels and exact subject printed, deepest blacks will be pretty much complete within 1 minute after the blacks start. With more time blacks continue to spread very evenly throughout the print, touching very low shadows, then middle shadows, etc in a very easy to control fashion for snatch point. My total dev time was probably around 5 minutes, at the very end of the session.
Surprisingly cooltone color spectrum. Some papers might show a hint of warmth especially in blacks, but mostly it’s neutral, lilac, a hint of olive, and deep blacks for a spectrum on the 2 papers tried so far (MGV, Ilford Warmtone RC). This would be an ideal developer for those who don’t like the color of lith prints or that want a mostly blank slate for toning purposes, such as if you want true blues rather than purple with gold toner on a normally warmtone paper.
Fairly coarse grain, especially in shadows.
Great tray life, both in terms of time and print capacity. I was constantly making adjustments as I went, but never added more HQ in 1.5 hours of developing, and it was producing good deep infectious blacks right up until I ran out of time and had to neutralize and dump it. I ended up printing probably 5 8x10 and 6 5x7 prints.
Not greatly sensitive to sulfite content. Despite using a somewhat high amount of sulfite, it did not impact infectious development too much here. It definitely will slow it down some, but it will not harm the depth of blacks and not slow it down exponentially. The difference in my testing between 40ml and 50ml is ~1m of extra development time needed to get blacks to an identical level.
And now time for everyone’s favorite part, my best guesses and experiments on what each component does and how it can be adjusted.
Component considerations
HQ-TEA — I think this actually could’ve been reduced significantly though at the expense of effective tray life. But I haven’t really bothered to test that theory yet.
Phenidone — I chose this based on the patent, but also because it’s a “poor” developer, typically incapable of developing good blacks on its own like other developing agents, ie, metol. The reaction between Phenidone and HQ also is somewhat researched and published. Basically HQ will oxidize in the presence of oxidized phenidone (ie, when phenidone develops a grain) to produce phenidone and oxidized HQ. This oxidation happens stuck to the grain level, and so I guess in a super tiny amount, this basically helps the HQ work evenly across the print and to not carry so much sensitivity to sulfite, since it’s not the HQ causing the HQ to oxidize, but rather the side reaction of phenidone which seems to be responsible for the quick induction period. Note that due to this being a phenidone developer though, the expected decay behavior (aside from lack of buffer capacity) is for the developer to work great until it completely and utterly dies. This is actually kinda desirable for lith printing though, better than a slow inconsistent death where I stand over a tray for 15 minutes cause very little is happening and end up with crap blacks at 25 minutes. Additional phenidone can increase black levels and overall contrast, but too much suffers from runaway development in the highlights and midtones. I recommend making a 0.1% or even 0.01% solution for easy and precise measurement, an almost homeopathic amount of phenidone should be used. No phenidone at all will not exhibit infectious development.
Sulfite — I used a lot cause I wanted to cure the tray life problem. 50ml is definitely plenty for my purposes, but I’d expect you can actually use maybe up to 100ml with still good results. I think at some point the sulfite would eventually hamper the infectious development, but it’s not something I noticed a big difference in by adding more sulfite as I went.
Bromide — Unlike EXA, EXB is significantly less sensitive to bromide. Too much bromide can still decay blacks, but just adding a little bromide will give warmer (olive) blacks. Bromide also functions in a way similar to iodide in regards to tonal separation. Adding bromide will increase the shadow/black separation point so that it can be more easily controlled by snatch point. Basically it will increase contrast levels between shadows and blacks.
Benzotriazole — Some is required to prevent fog either way, but I think there might be too much at this point. Benzotriazole effectively will increase contrast levels between midtones and highlights. At current levels this means that whites tend to clip to actual white, rather than the typical tinted white that comes with normal lith printing.
Iodide — I added this on a whim initially. I couldn’t get benzotriazole to slow down the phenidone enough so that highlights developed slow enough for my liking. This is a greatly effective restrainer that works only on midtones and highlights. A little will restrain the highlights, quite a bit more also restrains midtones. A quite substantial amount will restrain upper shadows as well. I’ve yet to reach an experimental point where it prevented or restrained black development. Basically more iodide means more separation between blacks and the rest of the image. It also will impart a cooler tone. Because silver iodide is significantly less soluble in fixer than silver bromide or silver chloride though, a significantly longer fixing time should be used.
Sodium hydroxide / high pH. I’m not completely sure the pH actually needs to be this high, it’s definitely quite high for a standard lith printing solution. However, I noticed that higher pH actually seems to surprisingly slow down highlight speed to some extent and significantly increases shadow development speed. Of course, a high pH does make the developer less stable, but this can be remedied with the high amount of sulfite. Note that both benzotriazole and iodide will decrease the pH of the developer and so additions should be accompanied by a small addition of alkali
Toning EXA6 lith prints
Toning with lith prints has always been something that has been difficult for me to really grasp how to properly use. Many of my best lith prints are extremely colorful and then I try toning them and I just end up shifting to a worse color spectrum, or even taking most of the color out of the print. However, I didn’t feel like my report on EXA6 can really be complete until I tried toning a few. So, that’s what I did. I did quite a number of test prints, but these are the ones that I thought looked especially interesting. Also, just general notes:
MGV RC paper will respond very quickly to gold toning. It can be difficult to get a subtle bit of blue highlights, rather than changing both highlights and midtones. It responds about normally with selenium toning though.
If a lith print comes out as having rather subtle and neutral (boring) colors, that’s basically the perfect blank slate for toning.
Selenium on most lith prints will behave differently than a normal print. It produces brownish reddish shadows, rather than the typical purple shadows as with normal prints. However, leaving it too long will get to a brownish purple. Selenium is also extremely slow to affect the highlights of a lith print, even at strong dilutions like 1:5.
If you do gold toning after selenium, without a lot of time it won’t really do much to anything the selenium toner lays down.. With a lot of time though it’ll turn it the distinct gold blue as well though.
Note that all prints here were the prints that were scanned in the previous EXA6 reference blog post. So, you can go to that blog post to compare the toned vs untoned look. Each print was carefully color adjusted to match the look of the print in daylight as much as possible.
Michael’s One Shot Gold Toner Formula:
6g ammonium thiocyanate (60ml 10% solution)
2-3ml of 1% Gold Chloride solution
Make to 1L of water
The toner will typically only work for 2 or 3 prints, depending on how much toning you do to the print. It can be refreshed as you go with 1-3ml more gold chloride when it seems to stop working. Michael reports it as being “slow” and recommends hot water to speed it up, but I personally see it as being rather fast, too fast in many cases. Will produce cool blueish tones, especially in highlights.
Magic Lith Prototype Update #4 (EXA developer series)
Just FYI, I’ve begun using a naming series for my developer experiments. “EX” prefix (Earlz eXperiment), then developer “series”, then developer version, then finally (if relevant) print number. So for instance the print above is “EXA3C”. Developer series “A” (glycin+HQ paper lith), 3rd iteration, 3rd (C) print in the mix.
I’ve decided to try using some Glycin in this lith developer. It was made into a solution by dissolving 10g of glycin into ~180ml of TEA (triethanolamine). The idea behind it is that glycin should be a very soft-working developer capable of very nice highlight gradation, while also being (unconfirmed?) mildly superadditive with HQ and supposedly can function as a preservative/regenerator for developing agents. Thus far my experiments with it is interesting, but not really super lith-like. There is definitely an infectious development aspect happening, but it otherwise does not behave much like a lith developer, at least with this “non-lithable” paper choice. It’s fairly fine grained, higher contrast, and with subtle coloration.
The formula used:
(Pre-soak print for 1m before development to swell emulsion and remove incorporated developers)
2L of water (slightly warmer than room temp, about 80F)
10ml HQTEA 20%
15ml of Glycin-TEA 6%
12ml Sodium Sulfite 10%
25ml Benzotriazole 1%
2ml Potassium Bromide 10%
30ml Potassium Carbonate 30%
10ml Sodium Hydroxide 3%
(2 prints processed before above print was made)
Ingredient considerations:
HQTEA — I’ve found that too much HQTEA in developer with this much alkaline is actually too active, so I think 10ml here is the ideal amount. Previous tests used less and didn’t produce good blacks
Glycin-TEA — This is an interesting and unique developing agent. The initial idea behind using it was to improve highlight gradation and also improve the evenness of development. At both aspects it seems to excel, though requires careful formulation. Too much glycin in relation to HQ seems to “steal” development from the HQ and will not produce proper blacks, but beautiful soft highlights. Too little will cause unevenness in this formulation.
Sulfite — I was hoping that Glycin would allow me to significantly reduce the amount of sulfite, but this does not hold. Less than 5ml per 2L will quickly develop a red film and lose HQ activity and thus not develop proper blacks. Up to 15ml still exhibited decent infectious development
Benzotriazole — This ingredient is especially interesting. Adding Benzotriazole seemed to reduce highlight speed, without affecting black buildup. I believe this is because Benzotriazole will significantly reduce the activity of either HQ or Glycin (or both), but does not affect the infectious development action of HQ once it begins to take off. Previous tests with Benzotriazole before adding Glycin seems to indicate it will slow down highlight development of HQ, though once highlights are in place it won’t slow down infectious development. In the end, this I guess makes sense why it amplifies the uneven development problem. The edges will naturally develop a bit faster, and the benzotriazole will make center highlights come up slower compared to edge shadows once edge highlights are in place. This problem seemed to mostly go away with the addition of Glycin though, indicating I think that Glycin’s induction period is not very affected by even massive Benzotriazole additions. So, once Glycin gets the highlights into place then HQ will take over to develop the blacks more quickly than the HQ would otherwise touch highlights. This is still a big balancing act and over exposed/lower contrast results still have some uneven development, but this discovery I think is important in finding something more general purpose
Potassium Bromide — Bromide seems to do the opposite of Benzotriazole. Bromide will slow down overall development and especially infectious development. Some is required to keep development times reasonable, but really quite little should be used here. A surplus of bromide will cause the color to tilt toward olive green and erode blacks.
Potassium Carbonate — I wanted a more stable alkali than hydroxide
Hydroxide — With only carbonate in previous tests I didn’t quite get fast enough development nor good infectious blacks. With a bit of hydroxide addition this seemed to go away yet remained stable until the HQ oxidized. I think the Hydroxide helps the developer get over a “hump” in pH but to remain fairly stable afterwards
Overall, this is a really interesting developer begging for more testing. In the formulation here the evenness of development was quite good, highlights develop at different rates than shadows, and overall gradation is very interesting. There is some contrast control capability, but not nearly as flexible as with proper lith printing. With more exposure on the print before the one above there was definitely less contrast, but also more tendency for uneven development and low midtones seemed to race toward black more quickly than I’d like, while highlights remained fairly slow to develop. Development time is fairly short in these tests, around 2-5 minutes depending on exposure level and how many prints have been run. I think future direction will be increasing the Glycin and benzotriazole amount more while leaving the rest alone. I also want to see if I can reduce the alkali. I have a theory that HQ can’t penetrate the emulsion without high pH levels, but Glycin can and this makes a pathway for HQ to take over even at lower pH after glycin develops the initial highlights and such.
Magic Lith Prototype Update #3
No pictures this time because the results have been pretty boring. Basically, I’ve found that a magic lith formulation can be a lot more flexible than expected, with the primary requirement being a relatively high amount of hydroquinone and a relatively high pH. I’ve done some tests with alkaline prebaths. This seems to help the evenness of a print significantly, but comes with it’s own problems. The print can’t be rinsed after the prebath or else it returns to hardened form and will develop unevely. If the prebath is too alkaline and/or soaked for too long, the print will have a mottle-like effect, but will develop evenly otherwise and quite quickly with the low contrast image appearing rather quickly and then infectious development occurring throughout the print. If done properly the print can also be pulled more quickly and thus with more color. Thus far my best results have been with 2.5m with 1.5L of water + 15ml of 3% hydroxide.
I’ve changed to using a larger tray and 2L of developer at a time which seems to help the evenness as well as tray life but is not a complete solution.
Benzotriazole is an essential component in this developer. Without it, you will get both peppering and yellow staining on the border. With ~5ml/L both will go away. Too much seems to make the uneven development problem worse though.
Bromide is not as terrible as expected. I don’t really understand, but it has more effect in a carbonate based developer than a hydroxide developer, even if both are around the same pH. Iodide is optional.. I can’t really see a huge effect when it is present with bromide, even with a large amount of iodide. With very small or no bromide it does work as a restrainer of sorts, but not a good one.
HQ amount is still a bit of a mystery. More HQ will produce better blacks, but also cause more overall development. High amounts of HQ will produce some fogging with long development times and thus if higher contrast is desired, then going close to the normal print time (rather than massive over exposing) will produce a low contrast image which will then be affected by infectious development to produce proper blacks and darkening of low mid tones.
Magic Lith Prototype Update #2 (Lithalike Developer Discovery)
Today found an interesting discovery. Something I’ve dubbed “lithalike”. It’s definitely isn’t the same as standard lith printing. Thus far the big differences between lithalike and standard lith printing:
Probably impossible to get split toning (warm highlights, cold blacks) without of course toning afterwards (my gut says this process may actually tone in a similar way to lith prints)
Highlights will not have a “cast” like a lith print.. ie, where “whites” in the actual print area are peachy or lilac. Whites in lithalike are just boring white
Limited control of contrast through development/exposure techniques. I ended up using standard Ilford contrast filters to get the contrast where I wanted. Agitation can be used to control contrast to an extent without risk of an unevenly developed look. However, contrast can really only be altered with this by 1-2 grades.
Probably not as useful for expired paper. You only over expose by 1/2 stop at most with lithalike
Lithalike will probably work with pretty much any paper. It doesn’t rely on the delicate nature of infectious development too much, meaning unlithable papers can be used in this
And of course for the big similarities:
You will get ample paper grain. The exact appearance and prominence of grain depends on paper choice and can be altered somewhat with developer formulation and agitation technique. (note the examples here are 8x10 and printed from an FP4+ 6x4.5 negative. There is no visible grain in normal printing)
Plenty of color, even on typically very difficult papers like cold tone ones. With tests so far color trends toward green. Can probably be altered some with restrainer choice and paper choice etc.
The developer once mixed will expire quickly. 4-5 prints is the maximum, with some color and activity changes etc after each print
This process goes much closer to completion than standard lith printing, but it gives results I like better just before completion and compensate for this by adding 1/2 stop to exposure.
The big thing I like out of lith printing is the unique look of paper grain and how it’s significantly more prominent in shadows than highlights. For this purpose, it is definitely a developer I’ll use for actual prints at some point, once I’ve tweaked it to get rid of the green coloration. I’m hoping by changing the restrainer mixture a bit I can alter the color significantly.
Finally, here is the formula. I mixed it twice, so I know it works, but I do consider it a “prototype” and intend to tweak it significantly for my own purposes.
Lithalike Prototype Formula:
2L of water (warm, about 90F)
20ml HQ-TEA 5% (5g hydroquinone in 100ml of triethanolamine — not the same strength of HQ-TEA used in previous posts)
6ml sodium sulfite 10%
1ml potassium bromide 10%
7ml benzotriazole 1%
1ml potassium iodide 10%
60ml sodium hydroxide 3%
Note it is easiest to measure the HQ-TEA in a small graduate and then “rinse” the graduate several times into a larger graduate to measure out 2L of water. The solution can be mixed probably 1 hour before you need to actually print, but the sodium hydroxide should be added just before you start printing. Once it is added the developer will not last longer than 45 minutes at the very most.
Ingredient considerations:
HQ-TEA — I reduced the HQ-TEA concentration as I realized I was using 2g/L of hydroquinone in lith development which is extremely unusual. Typically the amount of HQ varies from 0.2-1g/L for lith printing. This extreme excess of HQ may be the mechanism that made the early Magic Lith results possible though. With significantly reduced HQ, I could not get infectious development to happen to any significantly visible extent like in previous runs. In the future I will probably stock both 5% and 20% solutions of HQ-TEA for experiments as large amounts of TEA can cause restrainers to stain prints
Sulfite — Very little sulfite should be used. Surprisingly despite using a large amount of alkaline and this small amount of sulfite, the developer lasted long enough to run multiple prints. Additional sulfite will reduce color and grain of lithalike
Bromide — Like previous magic lith experiments, this continues to be extremely sensitive to bromide additions, but a small amount seems to help reduce tendency for fogging and to slow down development so that it doesn’t develop unevenly
Benzotriazole — This developer has some fogging problems (yellow borders). The benzotriazole reduces this significantly without seeming to skew developer activity too much. With some papers more benzotriazole is required
Potassium Iodide — I’m not even sure this is necessary but my gut tells me it helps to ensure development is even
Hydroxide — The pH of this developer should be kept considerably higher than most lith printing developer formulas. More hydroxide has a tendency to increase potential fogging problems, but less will give worse blacks and contrast.
Agitation can be used quite extremely without getting uneven development. Less agitation in some ways will produce less contrast and in others more. Extremely soft agitation will produce an increase in grain. This doesn’t quite work as flexibly as real lith printing, but blacks will develop faster than highlights with no agitation, whereas with constant agitation the behavior is more linear. I experimented with agitation as little as every 3 minutes and got decent results, though blacks did suffer some as at that point blacks will exhaust. There is definitely a sweet spot to be found. For the most part agitation constantly and agitating once per 30s produce identical results but with less agitation the developer will probably exhaust a bit slower.
Overall this is far more “boring” compared to real lith printing, but it’s also a lot more reliable while still keeping some of the interesting aspects of lith printing.
Magic Lith Prototype Update #1
I’ve recently been experimenting with a prototype developer I’ve dubbed “magic lith”. This is a lith developer designed to work with any paper, including overly hardened RC papers. Primary test paper thus far is Ilford Cooltone RC. In normal lith developers it will not produce infectious blacks and will give a very low contrast and dull image.
Magic lith is being designed as an “HQTEA” mixture of individual components for simplicity. HQTEA is simply 60g of hydroquinone combined with 300ml of triethanolamine (TEA) to make ~350ml of HQTEA. HQTEA is a very simple way to preserve hydroquinone in a liquid(ish) solution. It will keep indefinitely but without a lot of sulfite will decay quickly once water is added. Using HQTEA is the ideal route to go for designing a lith developer because it keeps indefinitely and allows complete customization of the developer. TEA in theory may have some effect on the final result, even in very dilute solutions. At the very least it will increase the natural pH to ~10 for normal dilutions and ~11 for stronger dilutions. For standard lith printing, citric acid or some other stable acid can be used to reduce the pH for more color. TEA is very stable as a pH buffer and so doesn’t need to be constantly replenished like carbonate or hydroxide. The hydroquinone itself will die much quicker than the TEA.
The current starting point mix for magic lith is the following:
10ml HQTEA
3ml potassium bromide 10%
2ml potassium iodide 10%(!)
5ml benzotriazole 1%
10ml sodium sulfite 10%
50ml sodium carbonate 20%
1L luke warm water (~72F) — warmer water can be used but the developer will die even more quickly and development can speed up exponentially and be flat out difficult to control
This developer mix will die very quickly, within 2-3 prints. When the developer is yellow it is near death and ~2ml of sulfite should be added to keep it alive for one more print. Once the developer is red or brown and/or have a red film on top, it is dead. I’ve not done any testing with replenishment.
This developer produces “sort of lith” results with Cooltone RC. The tonality and grain is definitely there, but contrast is harder to control. Paper was over exposed by ~3 stops compared to a normal print. Paper should be rinsed before development to remove incorporated developers. Borders will be obvious within 30s, image will become visible around the edges at 2m, center will remain mostly invisible. Image will begin to become visible in the center at 3m. Infectious development happens around the edges at 5m. Center will appeared veiled, as if there is a layer of fog over it. As infectious development occurs, this fog will fade from the edges to the center. The veil appears to prevent infectious development from occurring in the areas affected. The end result will have significantly less development in the center than the edges. There is also some pepper fogging easily possible. The end result will be very grainy. With glossy MGV paper, the grain will somewhat follow the manufactured lines in the gloss finish, thus, pearl or some other finish is recommended. Cooltone RC does not seem to have these lines in the gloss finish.
The uneven development problem has been very difficult to solve. With no bromide and only iodide/benzotriazole, the center will actually develop faster than the edges. I believe there is a fine balance needed between the restrainer ratios and potentially the addition of more TEA (not HQTEA). The pepper fogging of course can be easily solved as normal with additional sulfite, though this can make infectious development a lot harder to achieve.
Component considerations:
HQTEA — The TEA may be the reason why this developer works at all. I’ve tried normal lith developers with a lot of part B and never got reasonable results. Regardless, the addition and subtraction of HQTEA hasn’t been thoroughly tested.
Bromide — This developer/paper is extremely sensitive to bromide. A little bit too much will completely prevent infectious development. Bromide will significantly slow down development, even for small amounts relative to most lith developers. With no bromide at all it will enter infectious development extremely quickly, even with significant amounts of other restrainers (ie, benzotriazole/iodide). Some amount is definitely required, but it must be carefully controlled. This also causes developer death to occur much easier since bromide is naturally released from paper development
Iodide — This seems to help balance the development between edges and center. Too much will stain the print edges yellow. Too little and edges will develop significantly faster than center. It seems like iodide helps to cut through the hardening to allow infectious development to occur faster
Benzotriazole — This is not a conventional addition to a lith developer as it basically just slows development down. Because of how active this developer is, I decided to add this to slow things down for getting the snatch point easier. I think this is an optional component though with the addition of bromide, but with minimal bromide this is also needed to prevent chemical fogging
Sulfite — Any HQTEA developer mix seems to be quite sensitive to the addition of sulfite. Too much and of course infectious development won’t occur, but too little and the developer dies during the first print. A lot more testing required to determine a proper maximum and minimum. The amount of HQTEA added affects the maximum amount of sulfite that can be used
Carbonate — This is simply used to get the pH of the developer to 11. If the developer is not to a high pH level, it will not cut through the hardening of the RC paper and never enter infectious development even with no restrainers, minimal sulfite, and a lot of HQTEA.
Water temp — Warmer water will not behave normally as expected for lith developer, ie, a linear speed up. It seems like as the water is made warmer development will exponentially speed up, making uneven development problems worse. I use luke warm so that it stays about the same temperature throughout testing.
Print aging — This will be much more affected by printing than many lith developers. The release of bromide causes the developer to slow a lot and the highly basic developer with minimal sulfite will naturally decay anyway. I don’t recommend trying replenishment nor use of old brown at this point.
A lot more testing to be done, but as seen above, there is big hope for producing a final Magic Lith recipe consisting of simply a part A and part B which will work with any paper. The results thus far show infectious development can happen, something previously regarded as impossible, and now the rest of the testing is just figuring out how to control that aspect so that the typical “lith split” between highlights and shadows can occur evenly across the entire print. Ideally the developer would last longer than 2-3 prints, but right now I’ll settle for whatever works and figure out better tray life later.
Lith Printing Experiment Report Nov 17, 2019
Tonight I ended up doing some second-pass lith development where you basically make a normal print and then bleach it and then lith print that. It can produce really unique results with some modern RC papers, though it’s definitely more tricky as it in my experience it can easily break the “golden rule” of lith printing, ie, that less exposure = more contrast.
I’m also preparing for a write up of The Ultimate Homebrew Lith Developer. TUHLD for short, heh. Basically the biggest problem with lith developers is that either they contain a relatively high amount of sulfite, the lith developer (part A) has practically no shelf-life nor tray life, or the lith developer contains formaldehyde and kills you slowly when you’re messing around in an enclosed room with 120F heated developer. The only real way of preserving hydroquinone in solution is to either add formaldehyde, put it into a very acidic solution and put a smaller amount of sulfite (but still absolutely some is required), or to never add water to it.
The solution I stumbled upon is to dissolve hydroquinone into TEA with absolutely no water added. Dissolving HQ into TEA is definitely not pleasant nor fast, but once it is mixed you have a somewhat easily mixed (well, as easily as HC-110) solution of HQ that keeps forever before adding water to it. It does involve adding several more “parts” to the lith developer, but actually makes it incredibly flexible for experimentation, since you can carefully vary the amount of sulfite, alkali, and restrainer. You can even try adding no sulfite at all and watch your developer quickly turn blood red with a weird film of oxidized HQ byproducts.
So, I’ll break down kinda the things learned a bit here in two parts. First, the TEA+HQ lith developer:
TEA can be heated to.. pretty hot (hot enough to burn but not scar you maybe) and at this point some HQ can be dissolved into it. I was able to somewhat easily dissolve 2.5g of HQ into 120ml of TEA, heated to around 80C/190F with a magnetic stirrer and constant stirring over about 20 minutes. The clear (photographic grade) TEA quickly went to yellow upon addition of HQ and basically looked pretty much exactly like HC-110 once it had sat for a day. I think more HQ could be dissolved, maybe 3g or even 3.5g into the same volume, but I don’t have a precise heating setup for stuff like this and I really didn’t want to get it insanely hot, and after 2g it really took a long time to dissolve the remaining 0.5g. If you want an easier time I’d aim for just 2g or 1.5g into 100ml
I didn’t mix a very large amount because I wasn’t sure it would work, but it worked great kept in a mostly empty bottle for ~5 days, no sign of difference between day 1 and day 5.
At least some amount of sulfite is absolutely required. In my experience around 0.2g sulfite is required for every 0.4g of HQ. Without sulfite, not only will it die in the tray quickly, but a tiny amount is needed for lith development to work properly. Infectious development is basically a cycle of which sulfite is a part of. If you do try adding no sulfite, your developer will quickly die and likely won’t even finish a single print, but you can save it by adding some sulfite to it. This basically turns the oxidation products (the red film that floats on top) back into usable HQ.
The TEA component is an alkali, but at the small amounts added for lith development, it’s not basic enough to make the developer work well. I recommend supplementing with a secondary alkali, HOWEVER, a significantly smaller amount will be required. Many part A lith developers are acidic, so you’re working against that with the part B alkali. In this case, the part A is already basic. I’d recommend adding 5 parts A (HQ+TEA), to 1 part B (base) to begin with.
I’ve tried using TEA as the part B alkali, but it requires a considerable amount. It does produce somewhat unique and slightly more colorful results with significantly better tray life of the part B component since TEA will form a lower but stable pH buffer compared to carbonate and hydroxide. However, I don’t really think it’s worth the extra expense. TEA isn’t that expensive, but it’s not cheap when you’re using 100ml for every lith printing session.
You can not mix most components into TEA. Specifically, neither bromide nor sulfite will go into TEA with no water present.
Mixing a developer like this will produce somewhat different results than a formaldehyde containing developer. The formaldehyde actually forms a sulfite like component which will shape the grains and such. Don’t expect any lith developer (commercial or homebrew) without formaldehyde to give exactly the same colors etc as a formaldehyde containing developer. The results can definitely be great, but your favorite paper may not look like what you want.. but your least favorite paper may look significantly improved. It just required testing.
Less sulfite is required for second-pass lith development. Sulfite helps to prevent fog and mottle and these basically aren’t a problem for second-pass lith, since there is no unexposed silver to fog. In addition less actual development happens in second-pass which means that your developer will die less quickly from development action.
You can surprisingly use this stuff until it’s really deep brown and it’ll still work for second-pass lith. It got a lot slower, but also a lot more colorful in its results.
Ok, with that out of the way. Next just some musings on second pass lith and my love hate relationship with it.
Most papers “work” to some extent with second pass lith, unlike with first pass lith. However, not all will produce the radically different results you’re looking for without a lot of testing. The primary papers I’ve tested are Ilford MGV RC and Ilford Cooltone RC
Cooltone RC can produce really nice split tones if you only partially bleach it. MGV is less colorful after drying, but partial bleaching can be a good way of keeping the brilliant blacks but getting some subtle colors in the highlights and better gradation from midtones to highlights
Second pass lith really breaks the golden rule that “less exposure and more development = more contrast”. For second pass lith contrast tends to be “fixed” without partial bleaching. I recommend printing a grade higher contrast level than you think you want if you intend to use partial bleaching to keep the blacks.
If you want maximum color, extremely slow lith developer should be used, ie, with little base and a lot of bromide. With this, you will NOT get proper blacks. If you do get proper blacks somehow, it’ll have little color and a lower amount of contrast than the original print. To get maximum color, you need to truly only partially develop it, removing some of the highlights. Thus, you need probably ~1/2 stop more exposure and partial bleach to keep the blacks, and then develop until you have the amount of highlight detail you want, and then quickly pull it before it reverts back to being over exposed.
Be extremely careful with bleaching. With RC it can quickly be rinsed to remove fixer using the standard 1m recommendation, but make sure that there is no residual fixer on your hands. With all handling, try to handle by the borders and highlights such as the sky. Any uncleanliness will be very obvious in shadows and blacks. Make sure to keep the same cleanliness standards when rinsing the bleach off the print.
Partial bleaching RC prints just doesn’t work well with all subjects. Large areas of black will bleach unevenly and then develop unevenly and can produce unattractive results after development
Prints can of course be gold toned afterwards. Be careful if trying to achieve a split tone though, as the “one-shot” gold toner I use (I’ll provide a recipe in a later post) can be fairly fast, and will change color slightly more after sitting in water. Gold toner can quickly destroy warm tones, but if done carefully can produce beautiful split tones with blue highlights and warm shadows.
First developer choice does matter, unlike much recommendations I’ve seen to settle on a neutral tone first developer, such as Dektol. I don’t have enough experience with this yet to talk in depth, but if doing partial bleaching, the shadows etc will mostly be set by the first developer. However, it also seems the first developer can somewhat change the results of bleached highlights and fully bleached prints. I need to do proper control tests, but for Ansco 130 vs Liquidol for first developer, it seems like Ansco 130 can produce especially warmer bleached highlights, while retaining it’s standard cold tone shadows with Cooltone RC paper. I experimented a lot and could not replicate the same look using Liquidol
Ilford RC papers will lose a lot of color upon drying. Some additional color can be revealed by rinsing after fixing in very hot water, but I’m unsure how much of this color actually sticks after drying
Ortho Litho/PFS Experiment Report Nov 15, 2019
No fancy pictures because all I used was a step chart and enlarger.. but did test and find out a number of things.
PFS-4 mixed with photographic grade TEA (ie, clear not yellow) is not as potent. Seems to require double the working strength and 25% more time for equivalent results. It does seem somewhat more stable to use with photographic TEA with less fogging, but actually looks to lose ~1/2 stop in unstable speed compared to technical grade TEA. Timing and such could potentially be adjusted further with pH balancing
PFS-4 as a stock solution seems to keep pretty much forever. The batch I mixed in August is still just as good today
PFS-4 can not be replaced by a simple carbonate+bromide solution. It’s clearly the TEA itself that is doing something to the film, not just having a basic environment with bromide present
The “stable” speed increase of Arista Ortho Litho with PFS-4 is ~2 stops. The unstable (ie, can be fogged/show artifacts) speed increase is ~3 stops.
PFS-4 is effective on Kodalith, though to a much lesser extent. The speed of Kodalith with nothing special is about 2.5 stops faster than Arista, and PFS-4 only adds 0.5-1 stop extra, though does seem to degrade the highlights somewhat and thus resulting in a more pleasant tonal scale, rather than going very dark on the negative, they go to a more mild grey. End result is that the speed of Kodalith with PFS-4 roughly matches that of Arista, but with a steeper contrast curve.
PFS-4 does NOT work on Kodak positive microfilm (ie, what FPP sells). Absolutely no difference is made between the two. Also, a fun fact people don’t mention is that it is blue sensitive only and can be processed under red safelight, maybe even amber safelight